Organization: Teacher Binders


Organization

Thankfully, I consider organization to be one of my strong points.  For the last several years of teaching I have used Erin Condren teacher planners for organizing my student information, lesson plans, and grades.   I absolutely LOVED my Erin Condren planners. Here is my planner from last year:


These planners come in a variety of designs and you can personalize them in many different ways.  This design is one of my all time favorites.  Inside there are pages with inspirational quotes, lesson plans, and student information.   You can find these planners on the Erin Condren website here.  

Here are some other pictures from inside my teacher planner from last year: 


 I decided to spend a little more money last year and add a picture of my family at my sister's wedding in Mexico. 


This is one of my favorite quotes!


This is the lesson plan template available in the planner.  One of the reasons I decided not to get the Erin Condren planner this year was because we switched from handwritten lesson plans to online plans.  Rather than typing the plans into planbook.com and then writing them in my planner, I simply print the plans from planbook.


This is the page for recording student grades and data.  Since we switched to standards based report cards this year, I don't record grades the same way.  Now grades are recorded into the student data notebooks. 

Erin Condren planners are absolutely wonderful! The only downfall is, if you aren't using all of the different features available in the planner, it may not be worth the cost. Therefore, this year, I decided to go back to creating a teacher binder and picking and choosing which resources to put inside. 


Here is a sample image of the different pages available in the binder I created for this year.  I put a table of contents at the beginning.  You can write in which resources can be found on which pages.  I then have my class list, and schedules.  I put a "notes" page next to each calendar so I can keep my notes organized by which month they were taken.  Also, there are student information sheets, a parent communication log, general information, usernames and passwords, and a page for recording important dates/student birthdays.  This type of notebook is generic and can be used for any grade level.  If you'd like to download this notebook, it is available for purchase at my TPT store for less than $5! 

Let me show you how I organized my binder!


First I just purchased a white 2-inch binder with the clear sleeves in the front and back, dividers, and clear sheet protectors.  I also purchased some card stock because I decided to print my teacher binder pages on card stock so they would last me the year.  These things are all optional.  The only thing you need is a binder!


On the inside I decided on these sections for my binder: Calendars/Important Dates, Lesson Plans, Student Information, Communication Log, Sub Plans/Information, Rubrics and Standards, and Assessments. 


These are my lesson plans that were printed straight from planbook.com and put into the lesson plans section! 


Behind the "rubrics and standards" tab, I have this rubric.  It is used to assign the students' grades.  These are the power standards we choose last year.


I also keep all of our common assessments (above) for the year in this binder behind the assessments tab along with the pages for the student data notebooks (below).  I put all of the assessments in clear sheet protectors so I didn't have to hole-punch them. You can fit around 10-15 pages in each sheet protector. 

Creating and using this teacher binder has helped me stay organized this year.  It has been wonderful to have all of my important information all in one place.  I also take it with me to meetings or any PD opportunities so all of my notes stay in one place.  I plan to share another post in the future about different ways I stay organized within my classroom. 

I hope some of my organizational tips will help you.  Thanks for reading! :)  Happy Wednesday!


We All Have Feelings

    If you're reading this then you obviously already know that we all have feelings!  But is this something that all students understand?  They might know that we all have feelings but they don't necessarily understand what that means for them.  

We often find ourselves trying to teach our students to get along well with each other and to have empathy for one another. (Which is VERY important! So keep doing it!)  But we also need to remember that sometimes our students don't know how to identify with some of their own feelings, let alone other people's feelings! 

This year we decided to take a few days to discuss feelings with our students.  We are going to have a class discussion each day about a different feeling.  We will start out by introducing the feeling and brainstorming what that feeling means to different people.  For example, on the first day, we will discuss the feeling of excitement.  I will ask students to share different times and reasons they might feel excited.  Throughout the discussion students will begin to realize that what makes them excited might be completely different from that of their peers.  

After a meaningful class discussion, students will be given an opportunity to share their ideas through writing and drawing.

This is a sample page from the book I created for my students to use.  You could use any format you like for students to share their ideas.  

Through these meaningful discussions and writing activities, students begin to identify with their feelings.  After drafting out their ideas, it would be wonderful to share their writing.  Other conversations will begin to arise and eventually students will realize that their peers' feelings are just as important as their own.  It would be very easy to transition into conversations about respect and empathy after this type of activity. 

If you would like to download my product for this activity is is available for purchase on my TPT store here. 

I decided to make this post short and sweet for a change!  I hope you enjoyed it! Thanks for reading. :) 


Student Data Notebooks


UPDATE: I now offer these resources for purchase on my TPT store.  Thank you to all who expressed interest in my products!  The link as at the end of the post. 

What are student data notebooks?

A student data notebook is, basically, exactly what it sounds like: a notebook where students keep data.  There are so many different variations of student data notebooks.  One of the wonderful things about being an educator is the freedom to create and choose what you use in your classroom.  When creating student data notebooks you can create templates for tracking goals and assessments for the Common Core, spelling tests, Everyday Math assessments, or any other assessments used throughout the year.  I understand this is all pretty broad information so let me tell you what we're doing in my class!

Last year our first grade students experienced a great deal of success in their state mandated reading assessment, reading level growth, and math skills.  After discussing this success  with my team, we decided one of the greatest factors was setting and discussing goals.  For example, for the FAST (reading) assessment, we told the students, "Our goal is to be able to read 41 words in a minute! Let's see if we can do it!"  We would then set the timer and they would give it their all.  Knowing their goal was motivating and it made them want to do better.  If they reached their goals, they all felt very accomplished.  If they didn't reach their goal, they eventually learned how to deal with that, accept it, and just work hard to get there the next time.  It was amazing how just setting and communicating those goals with the students made them so much more intrinsically motivated. 

One other example I'd like to share is the students' guided reading levels.  At the beginning of the year we determine our students' guided reading level through Pioneer Valley and through running records.  We then tell each student their level and give them "good fit" books to practice reading.  After each week we conduct a running record to determine their instructional reading level.  If a student reads at the independent level, they are bumped up to the next level.  We work with each student to set a goal for the following week.  We also work with the student to set a goal for their reading level at the end of each month or quarter.  Simply setting these goals has motivated our students tremendously. 

FINALLY to the student data notebook...

You might be asking: Where do I keep that data?  Where do we write the goals?  How do I have time to do all this? 

If you read my "Classroom Tour" post from last week, you might have noticed the piles of white notebooks on the shelf.  

  
These are my students' student data notebooks.  The front cover is a piece of red construction paper with their name on it.  This gives the students the opportunity to decorate their cover and personalize each notebook.

Inside we have made a student graph for each common core "power standard".  These are the standards that will appear on our report cards.  We know that we can't realistically report on every single first grade standard and discuss them with parents.  Therefore, we decided on which standards are the "power standards" and these are the ones we have chosen to report and put in our data notebooks.  Those look like this:


 We have designed an assessment to measure each of these power standards.  At the top of each assessment you will see a similar rubric.


After the student takes the assessment and it is graded, I circle which level of the rubric he or she has accomplished.  Then all we need to do is pass out the assessment and the student data notebook and record their results.  As you can see from the bottom of the data notebook pages, we plan to assess each standard multiple times.  When the students record their results, they write the assessment date on the bottom part of the graph, then they color up to the level of the rubric that they accomplished on that particular assessment.  

As the year goes on, students will be able to physically see their growth.  This is incredibly important and powerful. 

The best part is, it doesn't have to end there!  You can also use this method to track reading level, fluency, spelling tests, sight word assessments, etc.   We use charts like this to chart their success in other areas. 


Each week during guided reading, after a running record is conducted, the student will grab their student data notebook and write which level book he or she read, how many words he or she read in a minute and then color up to that number on the graph.  We always make these data sheets in the form of a graph because then students can continually see their growth throughout the year!  

This may seem like a lot of leg work up front, but I think it is worth it!  I am excited to implement these notebooks this year and see the growth of my students.  Sometimes, as teachers, it is very rewarding and just as motivating for us as it is for the students to see that growth.  I plan to share more blog posts about student data notebooks as the year goes on so stay tuned!  

Thanks for reading and have a wonderful week! :) 


and an editable version here 
The assessments we use to measure these standards are available for purchase here. 


Classroom Tour


The amount of time teachers spend figuring out how to effectively arrange, prepare, and set up their classroom is unreal.  For me it's one of the most exciting, stressful, and rewarding parts of teaching.  

As summer comes to a close, and the students are about to arrive, we spend a lot of time thinking about the specific students that will be in our classroom.  We think about how we can effectively teach those students in an inviting, comfortable, and effective environment.  

I have changed the layout and setup of my classroom each year and this year I am excited about some of the new arrangements and systems I have in place. 


One of my favorite areas of the room is my "teacher area".  This area is where my desk and my "U-Table" meet.  I decided to arrange the tables this way because when working with guided reading groups, I need a lot of different materials.  It is great to have all of those materials on and in my teacher desk.  It is neat and easily accessible with this type of arrangement.  


On my desk I have drawers for each of my guided reading groups.  In these drawers I keep leveled readers, sight word cards, comprehension notebooks, and any other materials specific to each group.


The number grid is attached to this shelving unit with velcro.  This way, I can detach it easily and use it for instruction at any time. 


This year I spent a lot of time trying to figure out how to make my classroom library more "cozy." Sectioning it off with my big portable whiteboard made it darker and enabled me to add lamps and other small lights to make it feel cozier. 


Rather than having an area in my room for the writing center, I set up writing bins for each table.  (Credit is owed to my wonderful team member for coming up with this!)  At the start of guided reading time, my table helpers will put this bin on their tables.  When students get to the "writing" rotation, they simply work at their table spot and all materials will be there.  Inside these bins are their writing notebooks, regular copy paper cut into fourths, a special writing pencil and eraser, and a box of markers.  Students glue their white copy paper into their page, write the date, draw a picture, and use their special pencils to free-write or respond to a particular writing prompt for the day. 


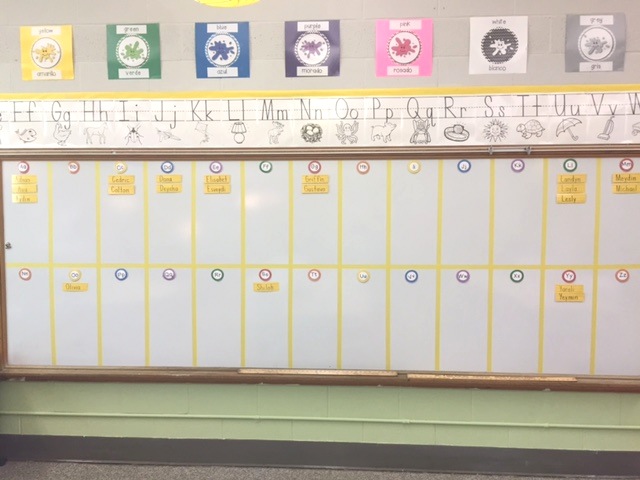
I have already discovered how wonderful it is to have one designated space for most instruction.  Last year I used the whiteboard on the opposite side of the room for calendar time and other instruction.  Students then had to switch to the "Smartboard carpet" for any instruction done on the smartboard.  Having all of this in one area saved me a lot of room up by the other board.  I now no longer need space in front of the other board for a carpet.  I simply use the other whiteboard as our word wall.


You might notice that there are no sight words on the word wall.  Much like many other teachers, we start the year with student names on the word wall.  As the year progresses, we add sight words to the wall as they are taught to the students. 


 I hope you enjoyed the classroom tour!  Stay tuned for more details on certain areas throughout the room and different systems we have in place!  

To those of you just starting out the school year, good luck!!! :) 


Word Work


This year I have decided to start a new routine for word work.  I wanted to do something more hands-on and exciting for the students.  During our guided reading time, students are split into four groups.  They are ability grouped by reading level.  We determine each student's reading level at the beginning of the year using a WONDERFUL free resource online.


This website gives us a great starting point.  From there, we group the students and use running records to reassess reading levels. We do this to make sure each student is reading "good-fit" books.  During the guided reading rotations, students rotate through the following centers:

-Read-to-Self
-Read-to-Teacher
-Writing Center
AND...
-Word Work!!!

When I introduced the different activities for word work, I saw my first graders' faces light up with excitement.  That might sound a little exaggerated, but they really were excited.  There are some supplies that you will need to have in your classroom in order to do these activities: any notebook that can be used for word work, alphabet stamps, washable stamp ink pads, markers, Play-Doh, popsicle sticks, alphabet stencils, old keyboards (or printouts of a keyboard). If you have some or all of those things you'll be ready to go! Here's the plan: each day of the week students get to do a different activity.  


Students will find copies of our weekly sight words in the Monday drawer.  They take out their word work notebook, sight word list, alphabet stamps, and stamp ink pads.  Students simply stamp as many of their sight words as they can!


Students will find copies of our weekly sight words in the Tuesday drawer.  They take out their word work notebook, sight word list, and markers.  Students write their words as colorful as they'd like!


HERE'S THE FAVORITE...


Students will find copies of our weekly sight words in the Wednesday drawer.  They take out their word work notebook, sight word list, Play-Doh, and a popsicle stick.  Students will flatten the Play-Doh on their table spot.  With the popsicle stick, they will carve each word into the flattened Play-Doh.  After each word, students must also write their sight word in their notebooks. 


Students will find copies of our weekly sight words in the Thursday drawer.  They take out their word work notebook, sight word list, alphabet stencils, and a pencil.  Students will simply trace each sight word into their notebooks!

Students will find copies of our weekly sight words in the Friday drawer.  They take out their word work notebook, sight word list, and an old keyboard.  Students will practice typing each word on the keyboard.  After each word, they must also write the word into their word work notebooks.  If you can't get your hands on some old keyboards, you can download this free keyboard PDF to print for students to use:


This is a great opportunity for students to practice using a keyboard and a great way to prepare them for future computer use.  

The activities above are the 5 activities that I have chosen to use each day in my class.  There are several other hands-on activities that you can do with your students.

  • Create a word search using your sight words on this website: http://puzzlemaker.discoveryeducation.com/WordSearchSetupForm.asp 
  • Students use alphabet magnets or scrabble tiles to spell out each sight word. 
  • Students write each sight word on fun scrapbook paper. 
  • Students can alphabetize the list of sight words.
  • Students use old magazines or newspapers to find sight words or cut them out. 
  • Students write each sight word using fancy writing.


I am so excited to share these things with you and I hope that you can use some of these fun ideas!  Many of these ideas I have learned from other teachers and/or websites.  Word work is an incredibly important time for students to do hands-on activities to practice mastery of word lists.  If done correctly, the word work center can become one of the most anticipated times of the day! :) 


It's All About RESPECT


Hello bloggers! As many of you may be in the middle of your first or second week of the school year; I thought today it might be appropriate to share my ideas for teaching students respect.  Of course, as teachers, we must model what it looks like to be respectful.  We must also treat our students with respect in order for them to fully understand why they should and how they can be respectful.

As a first grade teacher, I do several read alouds to introduce our topic of discussion when learning all about respect.  Some of my favorite titles for teaching respect include:


The Berenstain Bears Show Some Respect!  

My Mouth is a Volcano!

and....
Have You Filled A Bucket Today?


 The wonderful thing about being a teacher today is all the resources and ideas you can find on blogs, pinterest, and google!  Some other really great titles include: 
"What If Everybody Did That?"
"Dude, That's Rude!"
"Nonstop Talker"
and so many more! 

After reading a story aloud and having a meaningful discussion about the story, we talk about how we can learn from the story and how it can relate to our own school or classroom.  We also discuss the importance of transferring these relevant skills throughout the rest of their lives.  We want to teach students to be respectful in school (of course!) but also at home, at restaurants, at sporting events, and any other time.

We discuss the importance of showing respect to other people, ourselves, and material things.  

I have created a short series of lessons (with corresponding worksheets) to help teach students the basics of being respectful.  The first lesson is a freebie!

Lesson #1:
After reading your favorite book for teaching respect, use this writing activity to expand your lesson. This includes an area for writing and an area for students to add an illustration.  It encourages students to think about how respect can make them feel and how disrespect can make them feel.  Students respond to the prompt, add an illustration, and they can share their thoughts with the class after. 

To download this lesson on my TPT site, click here ! :)

If you wish to take the lesson a step further, you can check out lesson number #2!

Lesson #2:
This lesson can be used to to follow the first but it can also be used on its own.  It is a good resource to help teach respect at the beginning of the year or during a citizenship social studies unit.  It encourages students to think about different ways they can show respect at home and at school.  It includes an area for students to respond to the writing prompt and add an illustration.

To download this lesson on my TPT site for $1.00, click here 

Lesson #3 and #4
The final two lessons are a package deal!  These lessons include a writing activity in which students share ideas about bullying and what the world would look like if everyone were respectful.  It encourages students to think in a positive way and share their own ideal world.  

You can find the link to these writing pages for $1.o0 on my TPT site here!

Respect has always been a big deal in my classroom.  At the end of the year I feel very proud if I can send my students to second grade as respectful young children.  Even just reading the stories listed above and having meaningful conversations with students makes a WORLD of difference.  I hope at least one part of this post can help you take a step towards educating young, respectful children! :)